
Quick Takeaways
- Kitchen cabinets and bathroom vanities account for 35 to 40% of most renovation budgets. The construction quality behind the door matters as much as how it looks.
- Plywood box construction outperforms particleboard for screw-holding and longevity. Worth specifying if budget allows.
- Soft-close hinges and full-extension drawer slides are now standard in mid-range and up. Specify both even in budget projects.
- Stock, semi-custom, and custom cabinets are not just price tiers. They are different products with different lead times and capabilities.
- Finish quality and prep work determine how long a painted cabinet stays looking good. The paint brand matters less than the prep and primer underneath it.
Kitchen cabinets and bathroom vanity choices are the most consequential decisions in any renovation. Cabinets alone account for 35 to 40% of most kitchen budgets. Yet most homeowners spend more time choosing a paint colour than understanding what is actually inside the cabinet box. That is where the mistakes happen.
What is inside the cabinet box, how the drawers are built, what the slides are rated for, whether the hinges are adjustable, how the finish was applied these are the decisions that determine whether your kitchen cabinets and bathroom vanity look good in fifteen years or start showing their age in five. None of them are visible once installation is complete.
Jump To a Section

Kitchen Cabinet Construction: What Is Inside the Box
The cabinet box is what you never see after installation. It is also what determines how long your kitchen cabinets and bathroom vanity last, how well they hold their contents, and whether they survive ten years of daily use. This section covers what to look for and what to specify.
Box Construction: Plywood vs MDF vs Particleboard
The cabinet box, the sides, bottom, top, and back, can be made from three primary materials. The choice affects durability, screw-holding strength, and how well the cabinet holds up in humid environments.
Plywood is the premium choice. It holds screws well, resists moisture better than the alternatives, and does not sag under heavy loads. Most cabinet makers use 3/4-inch plywood for box construction in mid-range and custom cabinets. It costs more but the performance difference is real over ten to fifteen years of use.
MDF (medium-density fibreboard) is denser than particleboard and takes paint beautifully. It is commonly used for door panels and drawer fronts. As a box material, it is acceptable but it does not hold screws as well as plywood and is more vulnerable to moisture swelling at edges.
Particleboard is the entry-level box material. It is heavy, holds screws poorly once they are stripped, and degrades quickly if it gets wet. It is common in stock cabinets. Not a reason to automatically reject a cabinet, but a reason to ask what else is compromised in the construction.
Framed vs Frameless: What the Difference Actually Is
A framed cabinet has a face frame, a border of solid wood attached to the front of the box. Doors and drawers attach to this frame. The frame adds structural rigidity and creates a traditional look. It also slightly reduces the interior opening, meaning drawers and pullouts have to be narrower to fit inside the frame opening.
A frameless cabinet, also called full-access or European-style, has no face frame. The door attaches directly to the side of the box. This gives you a wider interior opening for the same exterior cabinet width, and a cleaner, more contemporary look. The hinges used in frameless cabinets are European concealed hinges.
Neither is objectively better. Framed cabinets suit traditional and transitional kitchens. Frameless suits contemporary design and maximises interior access. The choice should be driven by the aesthetic direction of the kitchen, not a quality assumption.
Drawer Boxes: Dovetail vs Dowel Construction
The drawer box is the structural component that holds the drawer together. How the corners are joined determines how long it lasts under daily use.
Dovetail joints are the premium standard. The interlocking joint creates a mechanical connection that holds even when the adhesive breaks down over years of use. You can see the dovetail pattern on the inside corners of a well-built drawer. It is a reliable quality indicator.
Dowel construction uses cylindrical wooden pegs to connect the corners. It is adequate in a quality drawer box but relies more heavily on the adhesive for long-term strength. Budget drawer boxes often use staples or simple butt joints. These will loosen over time. Ask specifically how the drawer corners are constructed before you commit to any cabinet line.
Drawer Slides: What to Specify and Why
Undermount slides attach to the bottom of the drawer box and are completely hidden when the drawer is open. They provide better support, a cleaner look, and are the standard in mid-range and custom cabinetry. They also typically include soft-close and full-extension as standard features.
Side-mount slides attach to the sides of the drawer box and are visible when the drawer is open. They are functional and durable but look less refined. Common in stock and budget cabinetry.
Full-extension means the drawer opens completely, giving you access to the entire depth of the drawer. Partial extension drawers leave several inches of drawer depth inaccessible. Always specify full-extension.
Soft-close means the drawer slows and closes gently in the last few inches of travel. It reduces noise and prevents slamming, which extends the life of both the drawer and the cabinet box. Specify soft-close even in budget projects. The cost difference is minimal and the quality-of-life improvement is significant.
Hinges: What to Look For
Concealed European hinges are the industry standard for frameless and most framed cabinets. They sit completely inside the cabinet when the door is closed, are adjustable in three dimensions (up-down, left-right, in-out), and can accommodate soft-close mechanisms.
The three-way adjustability is important. Cabinets move slightly over time as the house settles. Adjustable hinges let you re-align doors without removing them. Non-adjustable hinges do not.
Soft-close hinges are now standard in mid-range and custom cabinetry. If a supplier is not including them, ask why. They are worth adding even at budget level. The difference in daily experience between a hard-closing and soft-closing cabinet door is immediately noticeable.
Pro Tip
When evaluating any cabinet line, ask your supplier or contractor three specific questions: What is the box material? Are the drawer slides undermount and full-extension? Are hinges adjustable and soft-close? Those three questions surface the most important construction differences faster than anything else.
Kitchen Cabinet Door Styles: Choosing What Fits Your Home
The door style is the most visible element of any kitchen cabinets and bathroom vanity. It sets the tone for the whole space. Here are the five styles you will encounter most in GTA renovations, with an honest assessment of each.
Kitchen Cabinets and Bathroom Vanity Finish Types: What Lasts and What to Watch Out For
The finish on your kitchen cabinets determines how they look, how they clean, and whether they can be updated in the future. These are the four main finish types you will encounter, plus a note on two-tone cabinetry.
Painted Finish
The most popular cabinet finish in GTA renovations. A well-painted cabinet is durable, cleanable, and can be refreshed or repainted in the future. It works on any door profile and in any colour.
The critical variable is prep and primer, not the topcoat paint brand. A properly sanded, primed, and finish-coated cabinet will hold up. A cabinet with insufficient prep will show chips, peeling, and brush marks within a few years regardless of how expensive the topcoat paint is.
Ask your cabinet supplier specifically: how many coats of primer, and is the surface sanded between coats? That question reveals a lot about the quality of the finish process. For understanding the cost implications of different finishes, see our Kitchen and Bathroom Materials Overview Guide.
Stained Finish
Stain penetrates the wood and allows the grain to show through. It is the right choice when you want the natural character of the wood to be visible. White oak stained cabinets, for example, show the distinctive grain pattern that makes the material worth choosing.
Stain is only appropriate for wood species that have visible, attractive grain patterns. Maple, oak, walnut, and cherry are all good candidates. MDF and most engineered wood products should not be stained because their surface absorbs stain unevenly and the result looks poor.
Stained cabinets are harder to refresh than painted ones. You cannot simply repaint over a stained finish without significant prep work. This is worth considering if you anticipate wanting to change the look of the kitchen in the future.
Thermofoil Finish
Thermofoil is a vinyl film that is vacuum-pressed over an MDF door profile. It gives the appearance of a painted finish at a lower cost and is available in a wide range of colours and textures, including some convincing wood-grain options.
The honest concern: thermofoil can peel near heat sources. The area closest to the stove or the oven, where sustained heat exposure is regular, is particularly vulnerable. Once thermofoil peels, it cannot be repaired and the door needs to be replaced.
It is a reasonable choice for lower-heat areas of the kitchen and for bathroom vanities where heat is not a factor. For cabinets directly adjacent to the range or oven, a painted finish is more durable.
Laminate Finish
High-pressure laminate (HPL) is a durable, budget-friendly option with a wide colour range including matte, gloss, textured, and wood-grain options. It is more scratch and impact resistant than thermofoil and does not peel.
The limitation: laminate cannot be repaired if it is chipped or damaged at an edge. The chip does not refinish. The door needs to be replaced. This makes damage management more important than with painted cabinets, which can be touched up.
Laminate is a solid mid-budget choice for contemporary kitchens, particularly in slab door profiles where the flat surface suits the material well. It is widely used in European kitchen design and holds up well in practice.
Two-Tone Cabinetry: When It Works and What to Avoid
Two-tone cabinetry uses different colours or finishes on upper and lower cabinets, or on the island versus the perimeter. Done well, it adds visual depth without committing to a single bold colour throughout. Done poorly, it creates a room that looks unresolved.
The combinations that work consistently: lighter upper cabinets with a deeper colour on the lower cabinets or island. Warm wood-grain lowers with painted white or greige uppers. The darker, heavier colour sits lower in the room, which is visually logical.
What to avoid: two colours with different undertones that do not coordinate with each other or with the flooring and countertop. Get physical samples of all elements together in the actual room before finalising a two-tone combination. For a broader look at how colour and finish choices fit into renovation materials planning, see the Kitchen and Bathroom Materials Overview Guide.
Pro Tip
If you plan to repaint your cabinets in the next ten years, choose a painted finish on a shaker or slab door. Both profiles are straightforward to sand and repaint. Thermofoil, laminate, raised panel with complex profiles, and stained wood are all significantly harder or impossible to refinish cleanly without professional help.
Stock vs Semi-Custom vs Custom: Choosing the Right Kitchen Cabinets and Bathroom Vanity for Your Budget
These are not simply three price points for the same product. They are fundamentally different purchasing models with different lead times, different size flexibility, and different capabilities. Understanding the difference helps you choose the right one for your budget and timeline.
Worth Knowing
Semi-custom is where most well-planned GTA kitchen renovations land. It offers enough size flexibility to eliminate filler strips in most spaces, a wide enough finish range to suit most design directions, and a lead time that fits a standard renovation schedule. If your budget can stretch to semi-custom, it typically delivers noticeably better results than stock at a cost difference that is less dramatic than most homeowners expect.
Kitchen Cabinets and Bathroom Vanity Hardware: Handles, Knobs, Pulls, and Finishes
Hardware is the easiest element of kitchen cabinets and bathroom vanity to change later and often the most neglected in the planning stage. Choose it early in the process, alongside the cabinet selection, not as a finishing detail after installation.
Cabinet Layout Considerations
Cabinet layout decisions are different from kitchen layout decisions. Kitchen layout is about the spatial arrangement of the room. Cabinet layout is about how the cabinets themselves are specified within that space. These four questions come up in almost every GTA kitchen renovation project.
Upper vs Lower Cabinet Balance
Most kitchens have more lower cabinet volume than upper. Lower cabinets are deeper (typically 24 inches versus 12 inches for uppers) and can accommodate pull-out drawers and larger storage. Upper cabinets are more accessible at eye level but less usable at the top shelf.
The trend toward removing upper cabinets entirely in favour of open shelving is one that should be approached carefully. Upper cabinets hold a significant volume of items. Before removing them, make a literal list of what is in yours and confirm where those things will go. The Kitchen and Bathroom Materials Overview Guide covers this in the storage planning section.
36-Inch Upper Cabinets vs 42-Inch: When to Go to the Ceiling
Standard upper cabinet height is 30 to 36 inches, leaving a gap between the top of the cabinet and a standard 8-foot ceiling. That gap collects grease and dust and is not functional storage.
Going to 42-inch uppers, or stacking a smaller row of cabinets above standard uppers, eliminates the gap and adds storage. In kitchens with 9 or 10-foot ceilings, taller uppers also correct the proportional imbalance that standard-height cabinets create in a tall room. The added cost is moderate relative to the functional and visual improvement.
Pantry Cabinets: When They Outperform Rows of Uppers
A single tall pantry cabinet can hold more dry goods than two or three standard upper cabinets, with better accessibility and a cleaner visual result. In kitchens where wall space is limited, a pantry cabinet flanking the refrigerator or at the end of a run is often more efficient than extending the upper cabinet run.
Pantry cabinets are also the right place to put pull-out shelving, which makes everything in a deep cabinet accessible. Standard pantry depth matches lower cabinet depth at 24 inches, allowing it to sit flush with the rest of the run.
Island Cabinet Layout
An island is not simply a row of base cabinets placed in the middle of the room. Island cabinets typically have finished sides, since those sides are visible. Perimeter cabinets rarely have finished sides because they sit against walls.
Island cabinet storage faces outward on all sides. The layout of drawers, doors, and open shelving on an island needs to account for which side faces the cook, which side faces guests at seating, and which sides are end panels. End panels are often decorative rather than functional storage. Planning island cabinet layout is a specific discipline that is worth discussing with your designer or contractor before the order is placed.
Pro Tip
Before finalising any cabinet layout, open every existing drawer and cabinet in your current kitchen and time how long it takes to access what you need. The friction points in your current layout — the corner cabinet you never open, the high shelf you need a step stool for, the pantry that gets reorganised every three months — are the problems your new layout should solve. Write them down before your first meeting with a designer.
Kitchen Cabinets and Bathroom Vanity: How Vanities Differ as a Cabinet Subcategory
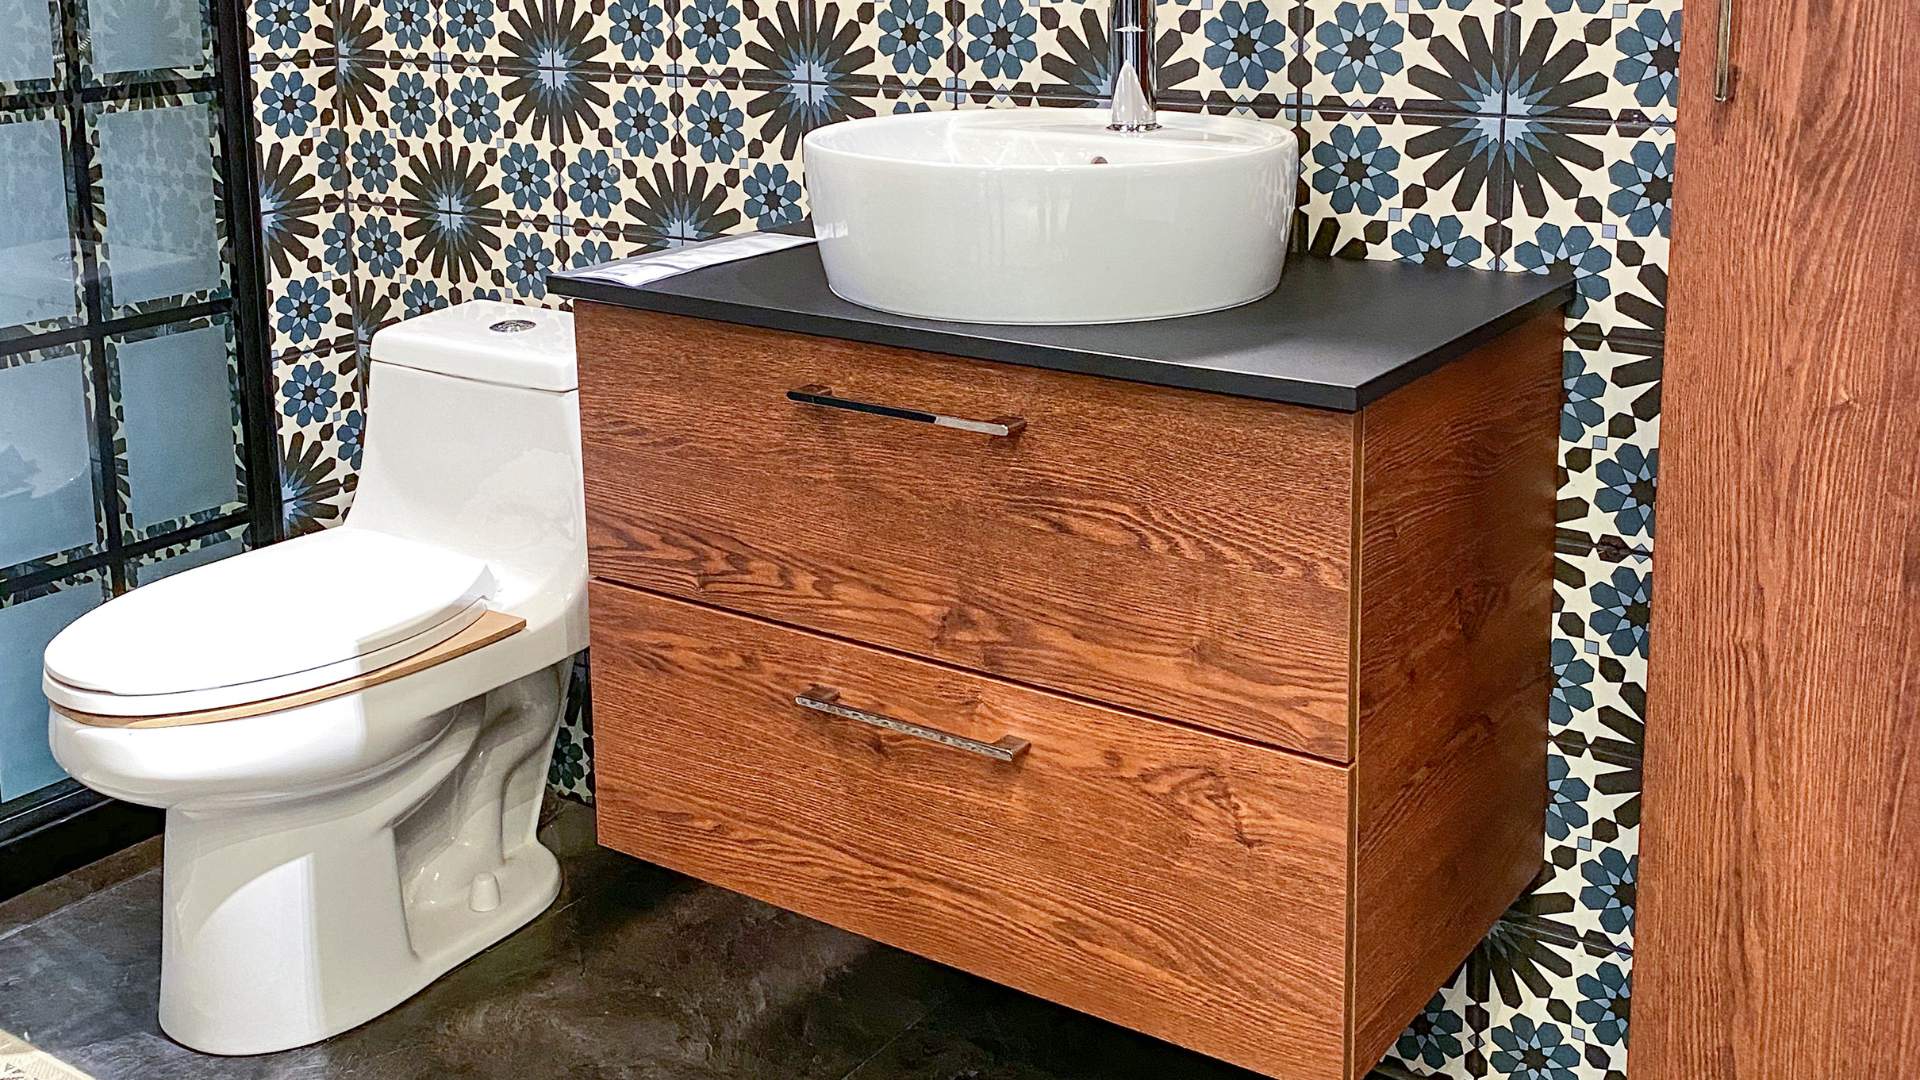
A bathroom vanity is essentially a specialised cabinet with plumbing provisions. Most of the construction principles that apply to kitchen cabinets also apply to bathroom vanity units, with a few specific differences worth knowing before you buy.
See Kitchen Cabinets and Vanities in Person
Cabinet construction and finish quality are much easier to evaluate in person than on a screen. We work with GTA homeowners from two locations and welcome you to come in and compare options with someone who has specified hundreds of cabinet projects across the region.
Richmond Hill Office 10815 Bathurst St, Unit 5 | Woodbridge Office 8A, 40 Innovation Dr
|
Frequently Asked Questions
What is the best cabinet box material for a kitchen renovation?
Plywood is the best performing box material for most kitchen renovations. It holds screws reliably, handles humidity better than particleboard, and does not sag under heavy loads over time. It costs more than particleboard but the performance difference compounds over ten to fifteen years of use. For bathroom vanities, plywood is especially worth specifying given the sustained humidity exposure.
What is the difference between framed and frameless kitchen cabinets?
Framed cabinets have a solid wood border (face frame) on the front of the box that doors and drawers attach to. Frameless cabinets attach doors directly to the box side with no face frame. Frameless gives a wider interior opening for the same exterior cabinet size and a cleaner contemporary look. Framed suits traditional and transitional aesthetics and provides additional structural rigidity. Neither is objectively superior in quality.
Should I specify soft-close hinges and drawer slides even on a budget renovation?
Yes. The cost difference between standard and soft-close hardware is relatively small on a per-hinge and per-slide basis. The daily quality-of-life difference is immediate and significant. Soft-close also extends the life of the cabinet box by reducing the impact of slamming over years of use. It is one of the few specification upgrades where the value is clearly proportional to the cost.
What is the most popular kitchen cabinet door style in Canada?
Shaker is the most popular cabinet door profile in Canada and has been for several years. It suits almost every design direction from traditional to contemporary, ages well, holds its resale value, and is available across all price tiers from stock to custom. If you are unsure about door style, shaker is the safe and practical default.
What is the difference between stock, semi-custom, and custom cabinets?
Stock cabinets are pre-built in standard sizes and available immediately or with short lead times. Semi-custom are built to order in a wider range of sizes with more finish options, typically with a 4 to 8 week lead time. Custom cabinets are built to exact dimensions in any style or finish, with the highest cost and longest lead time of 8 to 16 weeks. Semi-custom delivers the best balance of flexibility and value for most GTA kitchen renovations.
Can thermofoil cabinet doors be used near the stove?
Not ideally. Thermofoil is a vinyl film heat-pressed onto an MDF base. Near sustained heat sources, the film can separate from the substrate and peel. Cabinets directly adjacent to the range or oven are better specified in a painted or laminate finish. Thermofoil is a reasonable choice in lower-heat areas of the kitchen and for bathroom vanities where heat is not a factor.
How do I choose cabinet hardware finish?
Coordinate hardware finish with the other metals in the room: faucet, range hood, appliance handles, and light fixtures. They do not need to match exactly but they should sit within the same tone family. Brushed gold and matte black are the most common current choices in GTA renovations. Polished chrome has faded from its previously dominant position. Choose early in the design process, not as an afterthought after installation.
What is an inset cabinet door and is it worth the extra cost?
An inset door sits flush inside the cabinet frame rather than overlapping it. The result is a precise, clean line around the door that reads as premium craftsmanship. It costs more because the tolerances required for a properly fitting inset door are tighter and the work is more demanding. It is worth it in a higher-budget renovation where the detail matters. In a budget renovation, the visual difference may not justify the cost premium.
What is the minimum vanity width for a double sink bathroom?
60 inches is the functional minimum for a double sink vanity, and 72 inches is more comfortable. Below 60 inches, the sinks are too close together and the counter space between them is too narrow to be useful. In bathrooms where a proper double sink does not fit, a single sink on a wider vanity base often provides more usable counter space than a narrow double-sink configuration.
How long does a kitchen cabinet renovation take in the GTA?
Stock cabinets can be available in days to a few weeks. Semi-custom typically takes 4 to 8 weeks from order to delivery. Custom cabinetry takes 8 to 16 weeks. Installation of a full kitchen once cabinets are delivered takes approximately 1 to 2 weeks depending on the scope. Counter templating and installation follows after cabinets are set. Total project timeline varies significantly depending on scope, trades scheduling, and permit requirements. Our renovation timeline and permit guide covers the full picture for Ontario homeowners.
Ready to Specify Your Kitchen Cabinets?
We help GTA homeowners work through every cabinet decision, from box construction to door style to hardware finish. Get a free quote or reach out to start the conversation.