
Quick Takeaways
- A good kitchen design and layout guide starts with function, not finishes.
- The work triangle is still useful, but it is not always the right framework for modern kitchens.
- Your layout type should match your space and how you actually cook, not just your taste.
- Minimum aisle clearance is 42 inches for one cook, 48 inches if two people share the kitchen.
- Plumbing and load-bearing walls are the biggest constraints when changing a kitchen footprint.
- Storage placement is a layout decision. Where your cabinets go changes how the kitchen works every day.
This kitchen design and layout guide exists because most kitchen renovations go sideways before a single cabinet is ordered. Not because of budget. Not because of bad taste. Because the layout was never really thought through.
People spend weeks picking finishes and colours, then realize they have nowhere practical to put the fridge, or the island blocks the oven, or there is no room to open the dishwasher while someone is standing at the stove. These are layout problems. And they are fixable, but only before construction starts.
Every piece of advice here connects back to how the kitchen works, not how it looks. If you want to understand the full cost picture alongside your layout decisions, our kitchen renovation cost guide is a good companion read.
Jump To a Section

Kitchen Design and Layout Guide: The Work Triangle Explained
The first thing any kitchen design and layout guide covers is the work triangle. It connects three points: the fridge, the sink, and the stove. These are your three most-used stations, and the distance between them should be short enough that you are not crossing the room every time you cook.
What It Is and Why It Still Matters
The original guideline says each leg of the triangle should be between 4 and 9 feet, and the total perimeter should sit between 13 and 26 feet. That range gives you enough room to move without the stations feeling cramped.
It still holds up in traditional single-wall, galley, L-shape, and U-shape kitchens. For a solo cook, it is an honest and practical starting point in any kitchen design and layout plan.
Where the Work Triangle Breaks Down
Islands complicate it. If you add a prep sink or a second cooktop to an island, you now have more than three points. The triangle does not account for that.
Open-plan kitchens are another issue. When the kitchen flows into the living or dining room, traffic from other areas cuts through what should be the cooking zone. People walking through your triangle while you are carrying a hot pan is not a design choice. It is a hazard.
Galley kitchens push the triangle into a narrow corridor. Two people trying to cook in a galley layout will collide. The triangle looks fine on paper. In practice, it is not a comfortable multi-cook kitchen.
For open-plan spaces and kitchens with multiple cooks, a zone-based kitchen design and layout approach works better. We cover that fully in the Traffic Flow and Zones section below.
Pro Tip
Before you draw anything, walk through your current kitchen and note the three things you reach for most when cooking a typical meal. That pattern tells you more about your workflow than any triangle formula.
Worth Remembering
The work triangle is a starting point, not a rule. Modern kitchen design and layout planning works better when you think in zones rather than a triangle between three appliances.
Kitchen Design and Layout Guide: Layout Types with Honest Pros and Cons
Any solid kitchen design and layout guide covers all six common layouts. Each one suits a specific type of space and a specific way of living. None of them is universally best. The right one depends on your room dimensions, how many people cook, and whether you want an island.
Galley Kitchen Layout
Two parallel runs of cabinets and counters with a corridor between them. Very efficient use of linear space. Everything is within reach.
- Works well for: Small spaces, narrow rooms, single cooks, rental apartments, secondary kitchens.
- Honest downside: Does not work well for two people cooking at once. There is one way in and one way out, which creates traffic problems. An island is not possible.
- Watch for: The corridor between the two runs should be at least 42 inches wide. Many older GTA homes have galley kitchens tighter than that.
L-Shape Kitchen Layout
Cabinets and counters on two adjacent walls, forming an L. One of the most versatile kitchen design and layout options available for mid-size homes across the GTA.
- Works well for: Medium-sized rooms, open-plan spaces, families who want room for an island.
- Honest downside: The corner where the two walls meet is often wasted. Corner cabinet solutions like lazy Susans, pull-outs, and magic corners help but add cost.
- Island possibility: Yes, if the room is wide enough. You need at least 42 to 48 inches of clearance between the island and the L-shape counters.
U-Shape Kitchen Layout
Cabinets on three walls. Maximum counter space. Maximum storage. You do not have to walk far for anything.
- Works well for: Serious cooks, large families, anyone who wants to keep everything close.
- Honest downside: Can feel enclosed, especially in a smaller room. Guests cannot easily hang around while you cook. Two people cooking at the same time can feel tight.
- Minimum space needed: At least 8 feet between the two facing runs of cabinets. Less than that and the kitchen feels like a tunnel.
Island Kitchen Layout
Any layout, usually L or U, with a freestanding work surface in the middle. Islands have become the most requested feature in GTA kitchen design and layout renovations over the last few years.
- Works well for: Open-plan kitchens, households where people gather in the kitchen, anyone who wants extra prep space or seating.
- Honest downside: Not always possible. Many kitchens do not have the space. People often try to squeeze in an island that is too small or leaves insufficient clearance.
- Clearance numbers: 42 inches on all sides for one cook. 48 inches if two people regularly share the kitchen. These are safety minimums, not suggestions.
- If you add a sink or cooktop to the island: You need ventilation, plumbing rough-in, and electrical. Budget for that upfront. See our guide on how to hire the right renovation contractor to plan these costs properly.
Pro Tip
A 36-inch wide island with seating on one side and 42-inch clearance on the other requires a kitchen that is at least 12 to 13 feet wide. Measure before you fall in love with the idea.
Peninsula Kitchen Layout
Think of a peninsula as an island attached to the wall on one end. It gives you many of the same benefits, extra prep surface, seating, and storage, without needing clearance on all four sides.
- Works well for: Smaller open-plan kitchens where a full island will not fit. Kitchens transitioning into a dining area.
- Honest downside: Limits traffic flow. Only one side is open, so movement can feel tight when someone is seated and another person is working at the stove.
Open-Plan Kitchen Layout
This is not really a cabinet layout on its own. It is a spatial arrangement where the kitchen shares a room with the living or dining area, usually by removing a wall.
- Works well for: Modern homes, entertaining, families who want the cook to stay connected with the rest of the house.
- Honest downside: Cooking smells and noise travel everywhere. You lose a wall that could have held cabinets. Ventilation becomes critical.
- Before removing any wall: Confirm with a structural engineer or contractor whether it is load-bearing. In many GTA homes, the wall between the kitchen and the dining room is structural. Check our permit and timeline guide for what this triggers in Ontario.
Kitchen Design and Layout Guide: Zones and Traffic Flow
The zone approach is more useful than the work triangle for most modern kitchen design and layout planning, especially open-plan kitchens. Group activities into logical areas and the kitchen flows naturally. Here are the four zones every layout should account for.
Prep Zone Counter space near the sink, with access to the fridge. Where you wash, chop, and assemble. Should be your largest continuous work surface. | Cooking Zone The stove and oven, plus at least 15 inches of counter on both sides. Do not put a cabinet door directly adjacent to the stove. It creates a hazard when open. |
Cleaning Zone The sink and dishwasher, placed next to each other. Counter on both sides for staging. The dishwasher door should not block the main traffic path when open. | Storage Zone Pantry, cabinets, fridge. Best positioned near the kitchen entry point so you can unload groceries without walking through the cooking area. |
How Many People Use Your Kitchen at Once?
This is a question most homeowners do not ask when going through a kitchen design and layout guide. They design for one person cooking, then find out the real-life version involves two adults trying to get dinner on the table at the same time while kids are moving through the room.
If two people cook together regularly, you need two prep areas, more than one access point to the fridge and pantry, and enough aisle width that one person passing behind another is not a problem. That usually means a minimum 48-inch aisle rather than 42.
Kitchen Design and Layout Guide: Clearance Numbers That Matter
No kitchen design and layout guide is complete without specific clearance numbers. These are the minimums. Going below them creates a kitchen that is uncomfortable or genuinely unsafe. Numbers come from standard building practice and National Kitchen and Bath Association guidelines.
One thing that catches people off guard: the fridge door swing. A standard right-hinge fridge in a corner or against a perpendicular wall can be nearly impossible to fully open. Check the hinge direction during planning, not after delivery.
Storage Planning in Your Kitchen Design and Layout
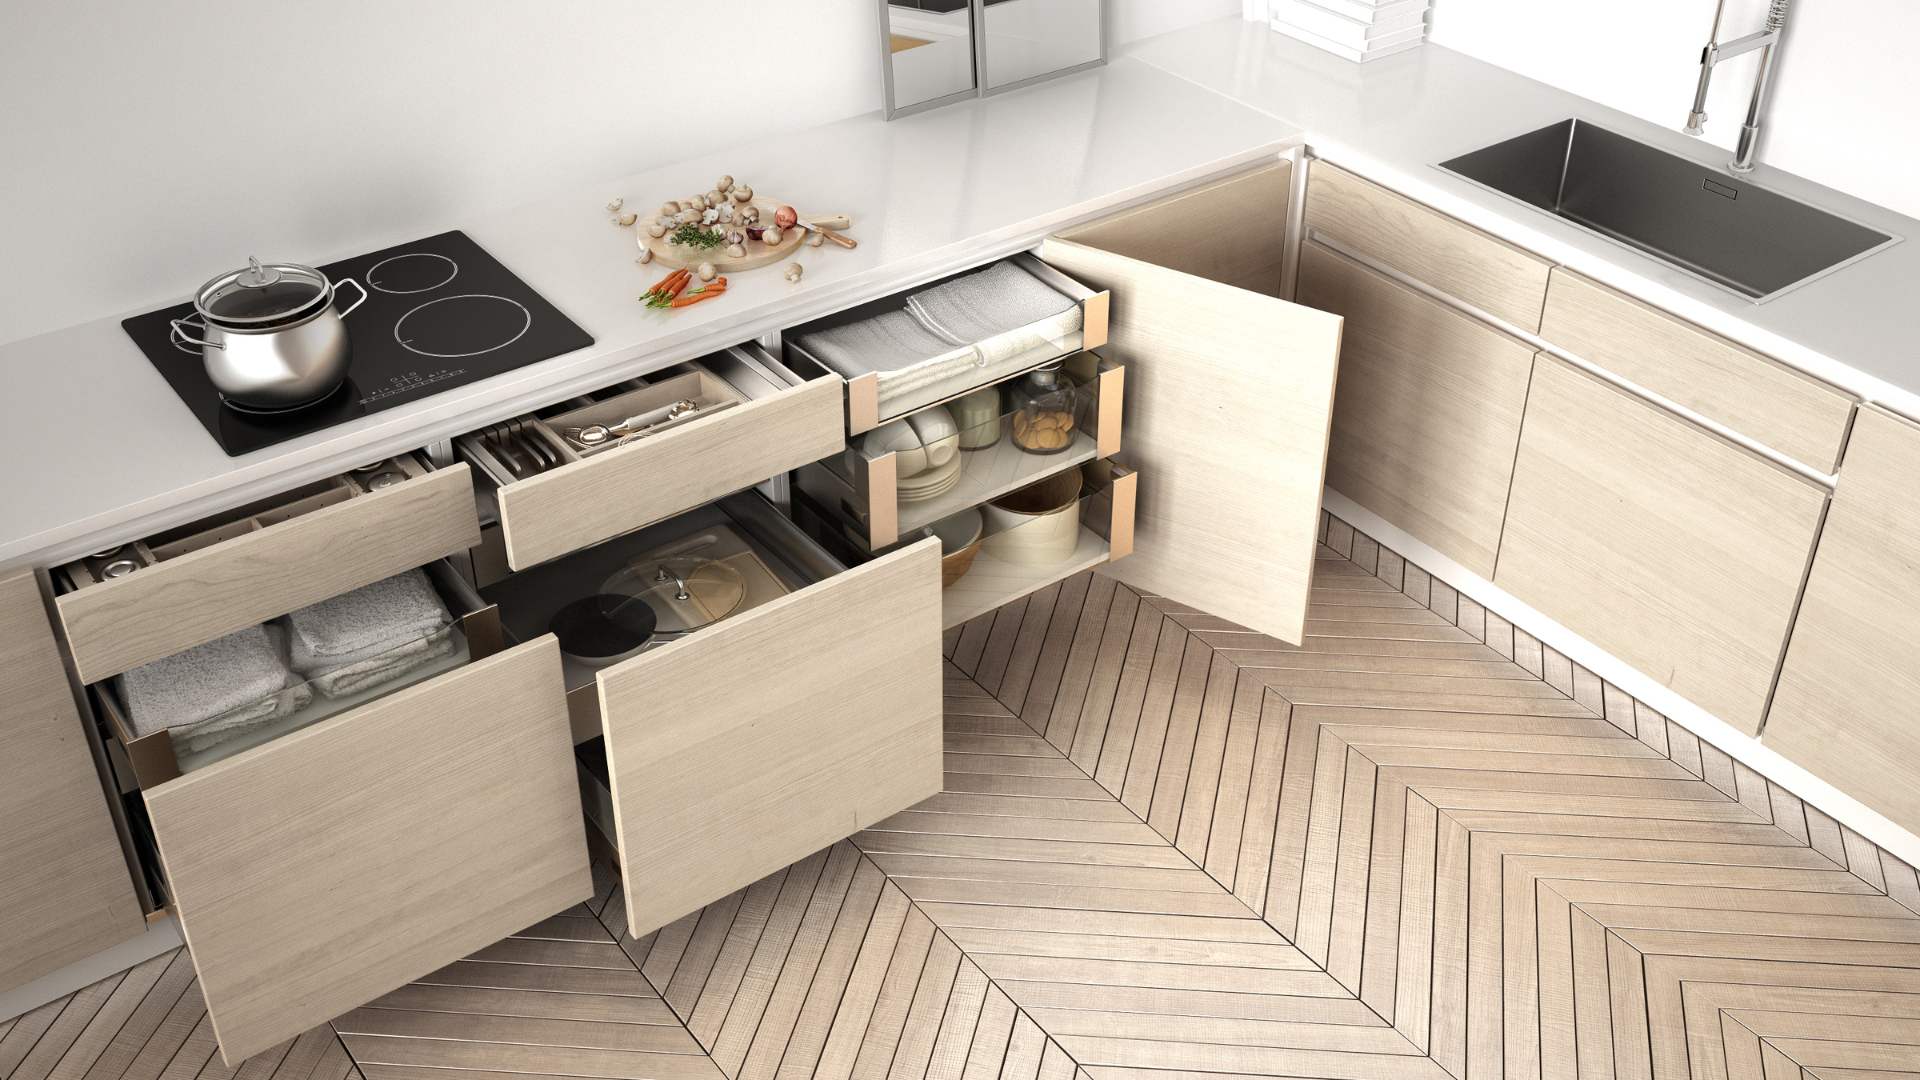
Storage placement is one of the most overlooked parts of any kitchen design and layout guide. Where your cabinets go is not just an aesthetic call. It changes how the kitchen functions every single day.
Storage decisions also affect your renovation budget in ways most people do not anticipate. For a full breakdown of where costs go, see our kitchen renovation cost guide for the GTA.
Ceiling Height in Kitchen Design and Layout Planning
Ceiling height is a detail many homeowners skip in their kitchen design and layout planning, then regret later. Standard kitchen ceiling height in most GTA homes is eight feet. Standard upper cabinet height is typically 30 to 36 inches, leaving a gap between the cabinet tops and the ceiling.
That gap collects grease and dust. It is not functional storage. Some homeowners fill it with crown moulding. Others extend cabinets to the ceiling, which eliminates the gap, adds storage, and makes the room feel taller.
In homes with nine or ten-foot ceilings, standard-height cabinets can look proportionally short. Going to 42-inch uppers, or stacking cabinets with a smaller row above, helps. It adds storage and looks intentional rather than unfinished.
Ceilings under eight feet, which exist in some older Toronto and Richmond Hill homes, limit your upper cabinet options. Taller people will bump their heads on open cabinet doors. Low ceilings are worth factoring into your layout plan early, before the cabinet order is placed.
Window Placement and Natural Light in Kitchen Design and Layout
Window placement is a frequently skipped topic in any kitchen design and layout guide. The sink is traditionally placed under a window. This is not just tradition. It is practical. You spend a lot of time standing at the sink, and natural light there makes tasks like washing produce or cleaning up more pleasant.
The stove is generally not placed under a window. Curtains and wood frames near an open flame are a fire risk, and a range hood venting through a window opening is not ideal from a structural standpoint.
When planning a renovation that involves moving the sink or changing a wall, check whether the window position still makes sense for your new kitchen design and layout. Moving a window is possible but adds to the project scope and cost.
Ventilation: A Critical Part of Kitchen Design and Layout
Range hoods are a late-stage afterthought in a lot of renovations. In a proper kitchen design and layout guide, ventilation is an early-stage decision. Where your stove goes determines how complex and costly ventilation becomes.
Wall-Mounted Range on an Exterior Wall
Duct routing is straightforward. It vents directly through the exterior wall or up through the ceiling and out the roof. This is the simplest ventilation scenario. If you have any choice in where the stove goes, an exterior wall location makes ventilation significantly easier and cheaper.
Stove on an Interior Wall
The duct has to run horizontally through the ceiling, sometimes a long distance, before exiting. Every turn and every foot of duct run reduces the hood’s effectiveness. It also means cutting through ceilings and possibly other rooms above. Factor this into your kitchen design and layout before committing to an interior wall stove position.
Island Cooktop
The most complex ventilation scenario. The hood has to hang from the ceiling with no wall to anchor it. The duct has to run up through the ceiling and out. This requires structural support for the hood, careful duct routing, and often a larger hood than you would use on a wall-mounted range.
Ductless recirculating hoods are an option when ducting is not possible, but they do not perform nearly as well as ducted systems for managing grease and moisture over the long term.
Pro Tip
If you are planning an island with a cooktop, bring your contractor and HVAC person into the conversation before you finalize the island size or position. Duct routing can change the ceiling height in adjacent rooms, and nobody wants to find that out mid-renovation.
Changing Your Kitchen Footprint: What This Kitchen Design and Layout Guide Recommends
Most kitchen renovations in the GTA stay within the existing footprint. You replace everything, cabinets, counters, appliances, and flooring, but the walls, plumbing, and electrical stay roughly where they are. This is the most cost-effective and least disruptive approach to kitchen design and layout.
Not sure what triggers a permit in Ontario or how long approvals take? Our renovation timeline and permit guide covers exactly that, including what happens if you skip the permit step.
Kitchen Design and Layout Trends GTA Homeowners Are Following Right Now
A few things worth knowing if you are working through a kitchen design and layout guide for an Ontario renovation in 2025 or 2026.
Open-Plan Is Still Popular, But With More Nuance
Open-concept kitchen design and layout is seeing some pushback as homeowners look for more separation and privacy. The full open-plan is still common, but more GTA renovations now incorporate partial walls, peninsulas, or islands as dividers, giving visual connection without fully merging the rooms.
Islands Are the Most-Requested Layout Feature
Kitchen islands continue to be a significant priority in kitchen design and layout planning, with the focus shifting to larger, more multifunctional designs that serve as dining, socializing, and food preparation areas. The challenge is that many GTA homes, particularly semis and townhouses, do not have the floor space to do this properly.
Zoned Layouts Are Replacing the Classic Triangle
Many Toronto designers now favour zoned kitchen design and layout approaches for greater efficiency. Our complete kitchen renovation guide covers how this affects your design process from start to finish.
Smart Kitchen Demand Is Growing Fast
Smart kitchen design is slated for strong growth, with an expected compound annual growth rate of 18% between 2024 and 2030. From a kitchen design and layout standpoint, this means planning for additional electrical outlets, USB charging points, and data connections during the rough-in phase. Much cheaper to do before the walls close than after.
One Thing Worth Remembering
The best kitchen design and layout outcomes follow the same pattern: the homeowner did the thinking early. Layout locked before demo. Materials ordered before construction. Numbers checked before falling in love with a feature. All of it requires discipline at the start of the process, when changes are still free.
Where to Find Smart Renovations
We serve homeowners across the Greater Toronto Area from two locations. If you are working through a kitchen design and layout guide for your home and want expert advice, we are here. You can also explore our work on Houzz.
Richmond Hill Office 10815 Bathurst St, Unit 5 | Woodbridge Office 8A, 40 Innovation Dr
|
Frequently Asked Questions About Kitchen Design and Layout
What is the best kitchen layout for a small kitchen?
A galley layout or a single-wall layout with a small peninsula works best for tight spaces. The key in any kitchen design and layout guide for small rooms is keeping the three main zones, prep, cooking, and cleaning, close together without blocking the only entry point.
How much clearance do you need for a kitchen island?
At least 42 inches on all sides for a single cook. If two people regularly cook together, 48 inches is the working minimum. Measure from the island to the nearest obstacle, a counter, a wall, or an open appliance door.
Can I add an island to my existing kitchen?
Maybe. Measure the available floor space carefully. If you have the clearance, a freestanding island is the simplest option with no plumbing or electrical required. A built-in island with a sink or cooktop requires permits, plumbing rough-in, and possibly ventilation work. See our permit guide to understand what that involves in Ontario.
What is the minimum width for a U-shape kitchen?
Eight feet between the two facing cabinet runs is the minimum. Any kitchen design and layout guide will tell you that less than that and the kitchen will feel like a corridor even though it has three walls of cabinetry.
Should the sink go under the window?
Traditionally yes, and it still makes practical sense. Natural light at the sink makes tasks more comfortable and gives you a sightline into the backyard. That said, if your layout or plumbing makes it difficult, it is not a rule you have to follow.
Do I need a permit to remove a wall in my kitchen in Ontario?
Yes, if the wall is load-bearing. Any structural work, adding a beam or modifying posts, requires a building permit in Ontario. Always confirm with your local municipality before starting demo. Our permit and timeline guide covers this in full detail.
How do I know if my kitchen wall is load-bearing?
A wall running perpendicular to the floor joists is usually load-bearing. Walls directly above a beam in the basement are also a sign. The most reliable way to know is to have a contractor or structural engineer assess it. Guessing wrong is expensive to fix.
Does moving the sink or stove add a lot of cost to a kitchen renovation?
Moving a sink means moving drain plumbing. Budget an additional $1,500 to $3,500 or more depending on how far it moves. Moving a gas stove means re-routing the gas line and a licensed gas fitter is required in Ontario. Our cost guide has a full breakdown of what these changes typically add to a GTA project.
How high should upper kitchen cabinets be?
Standard upper cabinets sit 18 inches above the countertop. The bottom of the upper cabinet is typically at 54 inches from the floor, which puts the counter at 36 inches, the standard counter height. Going higher than 18 inches above the counter means losing easy access to the bottom cabinet shelf.
What is the best way to plan a kitchen layout before meeting a contractor?
Measure the room accurately, all four walls, window and door locations, ceiling height, and the position of existing plumbing and electrical. Know how many people will use the kitchen at once. Write down what frustrates you about the current layout. That information puts you in a much stronger position than arriving with just a Pinterest board. When you are ready, contact our team and we will walk you through it.
Ready to Put This Kitchen Design and Layout Guide Into Action?
Our team has helped hundreds of GTA homeowners figure out what actually works for their space. We start with function, then build from there. Get a free quote or explore our renovation services below.